The Ultimate Wildlife Photography Camera Settings Guide
A complete field guide for Sony and Nikon photographers
- Part 1: Preparing Your Camera Before the Wildlife Appears
- Part 2: Camera Setup for Every Wildlife Situation
- Part 3: Autofocus, Shutters and Auto ISO – Getting the Most Out of Your Camera
- Part 4: Lenses, Memory Presets and Building an Efficient Wildlife Kit
- Part 5: Field Cheat Sheets, Common Mistakes and the Complete Wildlife Workflow
There is a saying among wildlife photographers: you don’t photograph wildlife when you see the animal—you photograph it when you prepared your camera five minutes earlier.
Unlike portrait or landscape photography, wildlife rarely gives you a second opportunity. A falcon may leave its perch in a fraction of a second. A fox may disappear into the bushes before you even raise your camera. An elephant’s display may last only a heartbeat.
The difference between coming home with an extraordinary image and an empty memory card often has very little to do with your camera model. More often, it comes down to preparation.
Modern cameras are astonishingly capable. Whether you shoot with a Sony Alpha 1 II, Sony A9 III, Nikon Z9, Nikon Z8, Sony A7 V, Sony A7R VI, Nikon Z6 III, Sony A6700 or Nikon Z50 II, today’s autofocus systems are far more advanced than those available only a few years ago. Yet even the smartest camera cannot compensate for poor preparation.
This guide is based on the settings and workflow I recommend for real wildlife photography. Some settings are universal, while others depend on the species you’re photographing, the available light, and the pace of the action. Think of this guide as the foundation you configure before every wildlife trip, regardless of your destination.
Before Leaving Home
The most successful wildlife photographers spend surprisingly little time changing settings in the field. Their cameras are already configured before the first animal appears.
Developing a consistent pre-departure routine not only reduces mistakes but also allows you to concentrate entirely on animal behaviour rather than camera menus.
Before every wildlife outing, I recommend checking the following:
Update the camera firmware if a tested update offers meaningful autofocus or performance improvements.
Fully charge every battery, including your spares.
Format every memory card inside the camera rather than on a computer.
- Verify that your memory recall presets are saved correctly.
- Confirm that RAW recording is enabled.
- Clean the front and rear lens elements.
- Check the sensor for dust if you recently changed lenses.
- Test autofocus on a nearby subject before leaving.
- Verify that pre-capture is enabled if you intend to use it.
Reset any unusual settings left over from a previous shoot, such as exposure compensation or self-timer.
A few minutes of preparation at home can prevent disappointment when the decisive moment arrives.
TechMission Tip
Keep one dedicated memory card in your camera at all times and rotate your spare cards rather than constantly swapping the primary card. It reduces wear on the card slot and makes it much harder to leave home without storage.
Universal Camera Configuration
Regardless of the camera you use, there are several settings that should become your default starting point for wildlife photography.
These settings form the foundation upon which all your custom presets will be built.
Record in RAW
If there is one setting I would never compromise on, it is image format.
Always photograph wildlife in RAW.
Wildlife photography often involves challenging lighting conditions. Bright skies, dark feathers, reflective water and deep shadows can all appear in the same frame. RAW files preserve significantly more image information than JPEG, giving you much greater flexibility when recovering highlights, lifting shadows and adjusting white balance during post-processing.
JPEG may produce smaller files, but it permanently discards information that cannot be recovered later.
Storage is inexpensive. Exceptional wildlife encounters are not.
TechMission Tip
If you’re worried about storage during long expeditions, carry additional memory cards or a portable SSD instead of switching to JPEG. Image quality should always take priority over storage capacity.
Autofocus Mode
For wildlife photography, continuous autofocus is the only practical choice.
On both Sony and Nikon cameras, select AF-C (Continuous Autofocus).
Unlike AF-S, which locks focus once, AF-C continuously updates focus as the subject moves. Whether you’re photographing an eagle approaching at speed or a deer walking through tall grass, the autofocus system must constantly adapt to changes in subject distance.
There are very few wildlife situations where AF-S offers an advantage.
Recommendation: Leave AF-C enabled permanently. Changing autofocus modes in the field wastes time and increases the likelihood of missing critical moments.
- Drive Mode
- Wildlife is unpredictable.
Rather than attempting to capture the perfect instant with a single frame, use your camera’s continuous shooting capability.
I recommend selecting Continuous High as your default drive mode.
For professional cameras such as the Sony Alpha 1 II, Sony A9 III, Nikon Z9 and Nikon Z8, don’t hesitate to use their maximum burst rates when photographing fast action. These cameras are designed for exactly this purpose and have the processing power and buffer performance to sustain high-speed shooting.
Mid-range cameras, including the Sony A7 V, Sony A7R VI and Nikon Z6 III, also perform exceptionally well in continuous shooting, although their buffer capacity may fill more quickly during extended bursts. Use short, controlled bursts rather than holding the shutter continuously.
APS-C cameras such as the Sony A6700 and Nikon Z50 II are remarkably capable wildlife cameras, but buffer limitations become more noticeable. Controlled bursts will generally deliver better results than continuous long sequences.
TechMission Tip
Avoid “spraying and praying.” Fire short bursts of three to eight frames instead of holding the shutter continuously. You’ll capture the decisive moment more consistently while keeping your buffer available for the next opportunity.
Silent Shooting
Electronic shutters have transformed wildlife photography by allowing photographers to work in complete silence. This can be particularly valuable when photographing shy animals or birds that are easily startled by the sound of a mechanical shutter.
However, silent shooting is not automatically the best choice for every camera.
I recommend enabling silent shooting primarily on cameras with extremely fast sensor readout speeds or, in the case of the Sony A9 III, its unique Global Shutter sensor.
These include:
- Sony A9 III (Global Shutter)
- Sony Alpha 1 II (Stacked CMOS)
- Nikon Z9 (Stacked CMOS)
- Nikon Z8 (Stacked CMOS)
These cameras exhibit minimal rolling shutter distortion during fast action, making electronic shutter suitable for the vast majority of wildlife situations.
Cameras with slower sensor readout speeds, including many mid-range and APS-C models, may produce visible rolling shutter distortion when photographing rapidly moving birds or when panning quickly. In those situations, a mechanical shutter may still provide more natural results.
We’ll examine the differences between mechanical, electronic and global shutters in detail later in this guide.
TechMission Tip
If you notice birds with curved wings during flight or vertical tree trunks appearing to lean while panning, you’re likely seeing rolling shutter distortion rather than a lens problem.
In-Body Image Stabilisation
Modern image stabilisation systems are remarkably effective, but they are often misunderstood.
As a general rule, leave stabilisation enabled for handheld wildlife photography.
It helps reduce camera shake, improves viewfinder stability when using long telephoto lenses, and can significantly increase your keeper rate when photographing stationary animals in low light.
There are, however, situations where stabilisation should be disabled.
If your camera is mounted on a sturdy tripod in calm conditions, stabilisation can occasionally introduce small corrections that actually reduce image sharpness. Likewise, when using very high shutter speeds—such as 1/3200 second for birds in flight—camera shake is already effectively frozen, making stabilisation less critical.
When deliberately panning with moving wildlife, use your lens or camera’s dedicated panning stabilisation mode if available.
TechMission Tip
Image stabilisation doesn’t freeze the movement of your subject—it only compensates for the movement of your camera. A sharp elephant standing still and a blurred bird in flight are both possible in the same image if your shutter speed is too slow.
Pre-Capture
One of the most significant advances in modern wildlife photography is Pre-Capture.
Sony refers to it as Pre-Capture, while Nikon calls the feature Pre-Release Capture.
Rather than waiting for you to press the shutter, the camera continuously records images into a temporary memory buffer while you half-press the shutter button or activate autofocus. When you fully press the shutter, the camera also saves the moments that occurred just before your reaction.
In practical terms, this means your camera can record the instant a bird leaves its perch even if your finger was a fraction of a second too late.
This feature is invaluable when photographing:
- Birds taking off
- Kingfishers diving
- Raptors attacking prey
- Deer jumping
- Animals suddenly interacting
Any unpredictable behaviour that happens faster than human reaction time
For most situations, I recommend setting the pre-capture duration to approximately 0.5 to 1 second. Longer durations increase storage requirements and buffer usage without providing significant additional benefit.
It’s also worth remembering that pre-capture isn’t something you need to leave enabled all day. Once the action has started and becomes more predictable, disabling it can help conserve buffer capacity and reduce the number of unnecessary frames you’ll need to review later.
TechMission Tip
Pre-capture doesn’t replace good timing—it extends it. The goal is still to anticipate behaviour rather than rely on the camera to rescue missed moments.
Looking Ahead
At this point, your camera is no longer using its factory defaults. It has been configured specifically for wildlife photography, with settings designed to maximise responsiveness before the action even begins.
In the next part of this guide, we’ll build on this foundation by exploring the optimal exposure settings for different wildlife scenarios—from birds in flight and fast-moving mammals to intimate wildlife portraits and dramatic sunset silhouettes. We’ll also look at how those recommendations vary across flagship, mid-range and APS-C Sony and Nikon cameras.
In the first part of this guide, we configured the camera itself. Before a single animal appears, your camera should already be shooting RAW, using continuous autofocus, continuous drive mode, image stabilisation where appropriate, and pre-capture when the situation calls for it.
Now comes the more dynamic part of wildlife photography.
There is no such thing as the perfect wildlife camera setting.
A soaring eagle, a resting lion, a dragonfly on a reed, and an elephant walking across the savannah all demand different priorities. Sometimes your goal is to freeze the fastest movement possible. At other times, image quality, background separation or depth of field become more important than shutter speed.
Rather than memorising a collection of numbers, I recommend understanding why each setting changes. Once you understand the reasoning, adapting to new situations becomes second nature.
Choosing the Right Camera Configuration
Modern Sony and Nikon cameras are remarkably capable, but they should not all be configured identically. Flagship cameras can comfortably handle more demanding autofocus modes and sustained burst shooting than entry-level or mid-range bodies.
Understanding your camera’s strengths allows you to get the most out of it.
Professional Flagships
- Sony Alpha 1 II
- Sony A9 III
- Nikon Z9
- Nikon Z8
These cameras represent the current pinnacle of wildlife photography. Their processing power, autofocus algorithms and burst performance allow you to rely more heavily on automation without sacrificing accuracy.
The Sony A9 III deserves special mention here. Thanks to its Global Shutter sensor, it completely eliminates rolling shutter distortion while allowing silent shooting at extraordinary burst rates. It is arguably the closest thing currently available to the ideal wildlife camera for action photography.
TechMission Tip
Just because your camera can shoot 120 frames per second doesn’t mean it should. Reserve extreme frame rates for split-second moments such as birds taking off or predators attacking prey. Otherwise, you’ll spend hours reviewing thousands of nearly identical images.
Mid-Level Full-Frame Cameras
- Sony A7 V
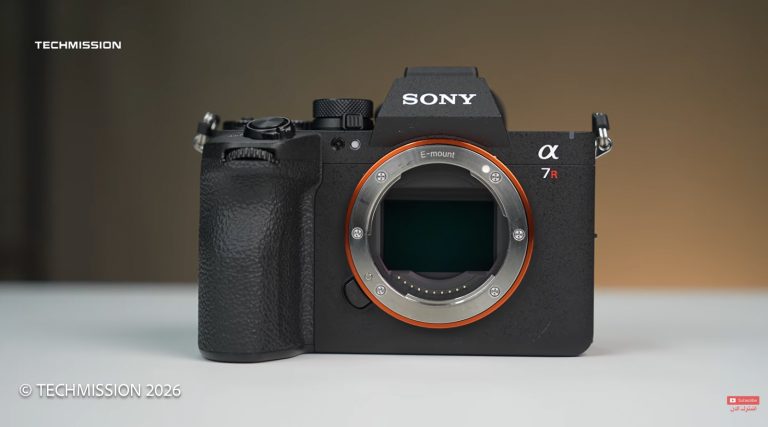
- Sony A7R VI
- Nikon Z6 III
These cameras deliver outstanding wildlife performance and are capable of producing professional results.
The only meaningful compromise compared to flagship models is sustained shooting speed and, in some cases, autofocus consistency during extremely demanding action sequences.
Rather than using the widest autofocus area all the time, I recommend slightly more controlled autofocus zones.
These modes reduce the chance of the autofocus locking onto foreground branches or distracting vegetation.
TechMission Tip
Don’t automatically choose the largest autofocus area available. Giving the autofocus system a smaller “working area” often improves consistency in cluttered environments such as forests or reeds.
APS-C Cameras
- Sony A6700
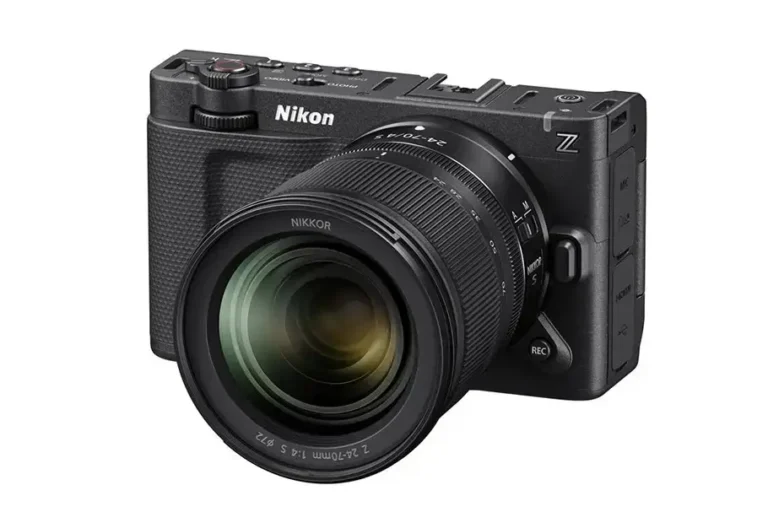
- Nikon Z50 II
APS-C cameras are often underestimated for wildlife photography.
In reality, they offer several genuine advantages.
Their crop factor effectively increases the apparent reach of telephoto lenses, allowing smaller and lighter equipment to produce tighter framing.
For example:
A 400mm lens on APS-C provides a field of view comparable to approximately 600mm on full frame.
That additional reach can make a significant difference when photographing distant birds.
Their smaller bodies also make them excellent companions during long hikes or travel expeditions where every gram matters.
The main limitation is buffer performance during extended bursts.
Use shorter bursts and anticipate behaviour rather than relying on continuous shooting.
TechMission Tip
Don’t think of APS-C cameras as “entry-level wildlife cameras.” Think of them as lightweight telephoto specialists.
Camera Settings for Real Wildlife Situations
- This is where wildlife photography becomes interesting.
- Each scenario places different demands on your camera.
Birds in Flight
Few photographic challenges are more demanding.
Your camera must acquire focus instantly, track a rapidly approaching subject, compensate for unpredictable movement and freeze wing motion—all simultaneously.
Increase to 1/4000 second for very small or extremely fast birds such as swallows or kingfishers.
- Aperture
- Wide open
- ISO
- Auto ISO
- Subject Detection
- Bird
- Autofocus
- Continuous Tracking
- Drive Mode
- Continuous High
- Pre-Capture
- Enabled
Birds rarely repeat the same movement twice. Every frame matters.
TechMission Tip
When photographing birds in flight, don’t place the bird in the centre of the frame throughout the entire sequence. Leave space in front of the bird for it to “fly into.” Your composition will immediately feel more dynamic.
Birds Landing
Landing birds often produce even more dramatic photographs than birds in flight.
Their wings spread wide, their feet extend forward and their body position changes constantly during the final seconds before touchdown.
Because landing sequences happen so quickly, resist the temptation to review images immediately afterwards.
- Stay ready.
- Many birds take off again only seconds later.
Fast Mammals
Whether you’re photographing a cheetah sprinting, a fox hunting or a dog running across open ground, freezing motion becomes the priority.
TechMission Tip
Focus on the animal’s eye whenever possible. Viewers naturally connect with the eyes first, even during high-speed action.
Walking Animals
Large mammals often move more slowly than photographers expect.
An elephant crossing a river or a giraffe walking across the plains usually doesn’t require extreme shutter speeds.
These slightly slower settings reduce ISO while maintaining excellent image quality.
Wildlife Portraits
- Wildlife portraits are among my favourite images to create.
- Unlike action photography, portraits reward patience.
You’re no longer trying to freeze explosive movement—you are trying to isolate the subject beautifully while capturing expression, eye contact and fine detail.
A beautifully blurred background draws attention directly to the animal while producing a strong sense of separation from its environment.
TechMission Tip
Don’t become obsessed with shooting everything wide open. If the animal is angled towards you rather than perfectly side-on, stopping down slightly may keep both eyes sharp without noticeably affecting background blur.
Resting Animals
Sometimes the most compelling wildlife photographs happen when nothing is moving.
- Sleeping lions.
- Owls at rest.
- A leopard watching quietly from a tree.
If your subject is completely stationary, you can safely prioritise image quality.
Continuous AF remains recommended, since animals can suddenly move without warning.
Environmental Wildlife
Not every wildlife image should tightly frame the subject.
Sometimes the landscape tells an equally important part of the story.
- A polar bear crossing drifting ice.
- An elephant beneath dramatic storm clouds.
- A lone wolf surrounded by snow.
These images rely on composition as much as they do on the animal itself.
70–200mm
- Shutter Speed
- Approximately 1/500 second
- Aperture
- F8 or narrower if additional depth of field is required.
- ISO
- Lowest practical value
- Drive Mode
- Single Shot or Low Continuous
TechMission Tip
Ask yourself whether the landscape adds to the story. If it doesn’t, move closer or zoom tighter. Every element in the frame should contribute to the photograph.
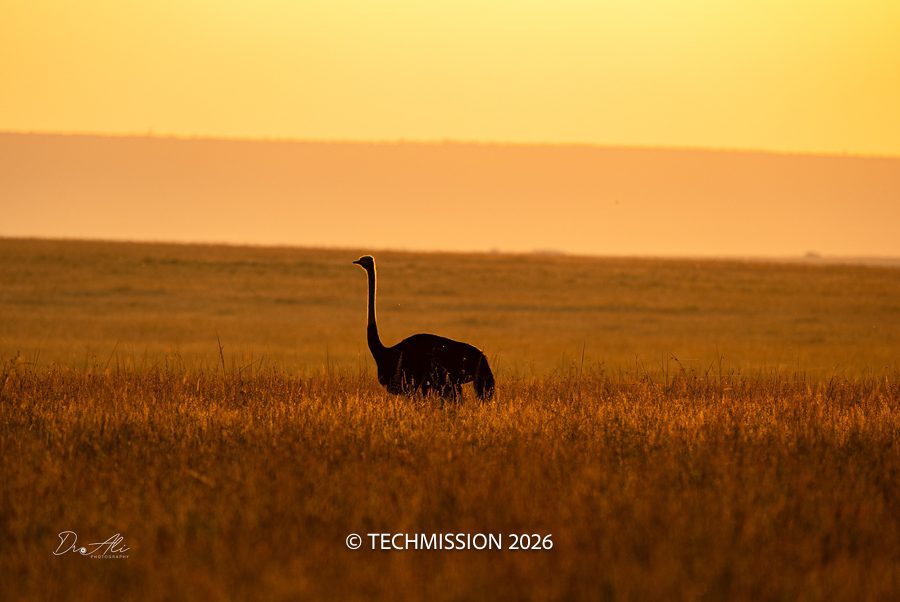
Sunset Silhouettes
Silhouettes are among the few situations where I recommend abandoning automated exposure.
The camera’s metering system naturally tries to brighten dark subjects—the exact opposite of what we want.
- Instead, take complete control.
- Recommended Settings
- Exposure Mode
- Manual
- ISO
- Base ISO
- Aperture
- F8 to F16 as required
- Shutter Speed
Adjust until the animal becomes a clean, featureless silhouette while preserving colour and detail in the sky.
- Metering
- Meter for the brightest part of the sky—not the animal.
This approach produces deep black silhouettes with vibrant sunset colours and maximum image quality.
TechMission Tip
Silhouettes are strongest when the outline of the animal is instantly recognisable. Wait until legs, horns, wings or the trunk separate cleanly rather than overlapping into a single shape.
Low-Light Wildlife
Early morning and late afternoon often produce the best wildlife behaviour—and the best light.
Unfortunately, they also challenge your camera.
Rather than reducing shutter speed too aggressively, allow Auto ISO to increase when necessary.
Modern cameras combined with today’s AI-powered noise reduction software can tolerate far more noise than missed focus or motion blur.
A noisy sharp image is almost always preferable to a clean blurred one.
Think in Scenarios, Not Settings
- The numbers throughout this chapter are not strict rules.
- They are reliable starting points.
- The goal is not to memorise shutter speeds.
The goal is to understand what the animal is likely to do next and configure your camera accordingly.
As you spend more time photographing wildlife, changing these settings becomes instinctive.
Eventually, you’ll stop thinking in terms of camera controls altogether and start thinking only about behaviour, light and composition.
And that is exactly where every wildlife photographer wants to be.
Modern wildlife photography is no longer limited by sensor resolution or burst rate. Today’s cameras are so capable that the real difference often comes down to how effectively they acquire focus, maintain focus and react to changing conditions.
This is also where discussions can become surprisingly polarised.
Sony photographers will tell you their autofocus is unmatched. Nikon photographers will point to the consistency of Nikon’s legendary 3D Tracking. Both are right—to a point.
After spending considerable time shooting wildlife with both systems, I’ve come to a simple conclusion: both Sony and Nikon produce world-class wildlife cameras. The differences are real, but they are much smaller than many internet debates would have you believe.
Understanding those differences allows you to configure each system to its strengths.
Sony vs Nikon Wildlife Autofocus
The question I am asked more than almost any other is simple:
“Which system has the better autofocus for wildlife?”
The honest answer is that both are exceptional, but they excel in slightly different ways.
Sony tends to identify subjects more quickly.
Nikon tends to hold onto subjects with remarkable consistency once focus has been acquired.
That distinction becomes important depending on the type of wildlife you photograph.
Sony Autofocus
Sony has invested heavily in AI-based subject recognition over the last several generations.
On cameras such as the Alpha 1 II, A9 III, A7R VI and A7 V, the camera analyses the entire scene and attempts to recognise the subject before autofocus even begins tracking.
Bird Eye AF is particularly impressive.
Small birds occupying only a tiny portion of the frame can often be recognised surprisingly early, allowing the camera to immediately prioritise the eye.
Sony’s Real-Time Tracking is equally impressive once engaged. By combining colour, shape, distance and AI subject recognition, it can maintain focus even during highly erratic movement.
Sony Strengths
- Outstanding Bird Eye AF
- Extremely fast subject recognition
- Excellent performance for birds in flight
- Superb tracking of rapidly changing movement
- Easy for beginners to configure
Sony Considerations
Like every autofocus system, Sony is not infallible.
Dense branches, reeds or foreground vegetation can occasionally attract focus before the intended subject, particularly when using very wide autofocus areas.
Reducing the autofocus area or positioning the initial focus point more deliberately often solves the problem.
TechMission Tip
I generally avoid relying on the largest autofocus area when photographing birds hidden among branches. A smaller tracking zone gives the camera clearer instructions about which subject I want it to prioritise.
Nikon Autofocus
Nikon’s autofocus philosophy feels slightly different.
Instead of relying primarily on rapid AI identification, Nikon’s renowned 3D Tracking excels at maintaining focus once the subject has been acquired.
It behaves almost like an experienced wildlife photographer who refuses to let go of the subject.
Combined with Bird Detection and Animal Detection, Nikon’s flagship cameras have become extraordinarily capable wildlife tools.
The system feels particularly reassuring when photographing birds weaving between trees or mammals moving through vegetation.
Nikon Strengths
- Outstanding 3D Tracking
- Excellent subject retention
- Very reliable through foreground clutter
- Predictable autofocus behaviour
- Excellent for experienced wildlife photographers
Nikon Considerations
Nikon’s autofocus offers considerable flexibility, but that flexibility also means there is a slightly steeper learning curve. Choosing the most appropriate autofocus area for each situation has a greater influence on performance than many photographers initially realise.
TechMission Tip
One of my favourite Nikon customisations is assigning Subject Detection to a function button. It allows me to switch instantly between birds and mammals without entering the camera menu.
Which One Is Better?
If I had to summarise the difference in a single sentence, it would be this:
Sony generally acquires focus faster. Nikon often maintains focus more tenaciously once it has locked onto the subject.
Fortunately, both systems now perform at a level where the photographer’s anticipation, fieldcraft and understanding of animal behaviour have a far greater impact on the final image than the autofocus system itself.
In other words, don’t choose a camera based solely on autofocus discussions on the internet. Choose the system that best suits your overall needs, then learn it thoroughly.
Mechanical vs Electronic Shutter
Few camera settings generate more confusion than shutter selection.
Many photographers assume electronic shutters are always superior because they are silent and often offer higher burst rates.
The reality is more nuanced.
Understanding the strengths and limitations of each shutter type allows you to choose the right tool for every situation.
Mechanical Shutter
A mechanical shutter physically opens and closes to expose the sensor.
- Despite sounding old-fashioned, it remains extremely useful.
- Advantages
- No rolling shutter distortion
- Reliable under artificial lighting
- Better compatibility with flash
- Consistent rendering of very fast movement
- Disadvantages
- Audible shutter noise
- Mechanical wear over time
- Lower maximum burst rates on some cameras
For many mid-range cameras with slower sensor readout speeds, the mechanical shutter remains my preferred choice when photographing extremely fast action.
Electronic Shutter
Electronic shutters eliminate moving mechanical parts entirely.
Instead, the sensor itself begins and ends the exposure electronically.
- Advantages
- Completely silent
- No shutter vibration
- Extremely high burst rates
- Reduced mechanical wear
- Disadvantages
On cameras with slower sensor readout speeds, electronic shutters may introduce rolling shutter distortion.
- Vertical objects may lean during rapid panning.
- Bird wings may appear unnaturally curved.
- Fast-moving propellers can become distorted.
The faster the sensor is read, the less noticeable these effects become.
Stacked Sensors
Modern stacked CMOS sensors dramatically reduce sensor readout time.
This is why cameras such as the Sony Alpha 1 II, Nikon Z9 and Nikon Z8 perform so well using electronic shutters.
Although rolling shutter is not eliminated entirely, it is reduced to the point where it becomes negligible in the overwhelming majority of wildlife situations.
That is why I generally recommend electronic shutter as the default option on these cameras.
Global Shutter
The Sony A9 III occupies a category of its own.
Unlike every other camera discussed in this guide, it uses a Global Shutter sensor.
Instead of reading the image line by line, the entire sensor is exposed simultaneously.
- The result is remarkable.
- Rolling shutter disappears completely.
- Fast-moving birds retain their natural wing shape.
- Rapid panning produces perfectly straight vertical lines.
- Silent shooting no longer requires compromise.
For wildlife photographers who regularly photograph fast action, the Global Shutter is one of the most significant technological advances in recent years.
TechMission Tip
If you photograph birds in flight every week, the Sony A9 III’s Global Shutter isn’t just another specification—it fundamentally changes how confidently you can use silent shooting.
What About Shutter Shock?
Shutter shock receives surprisingly little attention today, largely because modern mirrorless cameras have reduced the problem considerably.
Nevertheless, it can still occur.
Shutter shock refers to the small vibrations generated by the movement of the mechanical shutter, particularly at moderate shutter speeds where those vibrations have enough time to affect image sharpness.
It is most noticeable when:
- Using very long telephoto lenses.
- Shooting from a tripod.
Working around shutter speeds between approximately 1/60 and 1/250 second.
In wildlife photography, we often use significantly faster shutter speeds, meaning shutter shock is rarely a practical concern. However, if you are photographing resting animals in low light at slower shutter speeds, switching to an electronic shutter can eliminate this source of vibration—provided your camera does not suffer from objectionable rolling shutter.
So Which Shutter Should You Use?
- My general recommendation is straightforward.
- Sony A9 III
- Electronic shutter all the time.
Its Global Shutter removes the traditional disadvantages of electronic shooting.
- Sony Alpha 1 II
- Electronic shutter for almost every wildlife situation.
Switch to mechanical only if artificial lighting introduces flicker or if a very specific shooting situation demands it.
- Nikon Z9 and Nikon Z8
- Electronic shutter should also be your default choice.
Their stacked sensors are fast enough to make rolling shutter insignificant for virtually all wildlife photography.
Sony A7 V, Sony A7R VI, Nikon Z6 III, Sony A6700 and Nikon Z50 II
Choose according to the situation.
Electronic shutter works extremely well for many wildlife subjects, but mechanical shutter remains preferable when photographing very fast action if rolling shutter becomes visible.
Recommended Auto ISO Limits
Auto ISO is one of the most valuable features in modern wildlife photography.
Animals don’t wait while you adjust ISO manually.
Lighting changes constantly as subjects move between open sunlight, trees, water and shadow.
The key is to define a sensible upper limit rather than allowing the camera unlimited freedom.
These recommendations reflect the point at which I believe image quality remains consistently strong while still allowing sufficiently fast shutter speeds.
These values are starting points rather than strict rules.
| Camera | Recommended Maximum Auto ISO |
|---|---|
| Sony A9 III | 12800 |
| Sony Alpha 1 II | 12800 |
| Nikon Z9 | 12800 |
| Nikon Z8 | 12800 |
| Sony A7 V | 12800 |
| Nikon Z6 III | 12800 |
| Sony A7R VI | 8000 |
| Sony A6700 | 6400 |
| Nikon Z50 II | 6400 |
Today’s AI-powered noise reduction software has transformed what is considered an acceptable ISO. I would much rather accept a slightly noisy image than reduce shutter speed and risk motion blur or missed focus.
- Noise can often be reduced successfully in post-processing.
- Blur cannot.
TechMission Tip
Don’t judge high-ISO files at 200% magnification. View them at their intended output size. Many images that appear noisy when pixel peeping look excellent when printed or displayed online.
The Most Important Setting Isn’t in the Menu
After discussing autofocus systems, shutter technologies and ISO limits, it’s tempting to believe that better photographs come from better settings.
In reality, the single most important wildlife setting isn’t found anywhere in your camera menu.
It’s anticipation.
Understanding animal behaviour allows you to pre-focus, position yourself, choose the correct lens and activate the right memory preset before the decisive moment occurs.
The camera merely records the opportunity.
Recognising that opportunity remains the photographer’s responsibility.
By now, your camera is configured correctly.
Your autofocus is optimised, your shutter settings are appropriate for your camera, and you understand how exposure changes depending on the wildlife you’re photographing.
But there is another factor that often separates experienced wildlife photographers from beginners.
Workflow.
The best wildlife photographers rarely spend time searching through menus or deciding which settings to use next. Their camera is already organised, their lenses are chosen before the action begins, and every control has a purpose.
This chapter focuses on building that workflow.
Lens-Specific Camera Settings
One of the biggest mistakes photographers make is using the same camera settings regardless of the lens attached.
A 70–200mm behaves very differently from a 600mm super-telephoto.
As focal length increases, every small movement becomes more noticeable, autofocus has to work harder, and shutter speed becomes increasingly important.
Let’s look at each category.
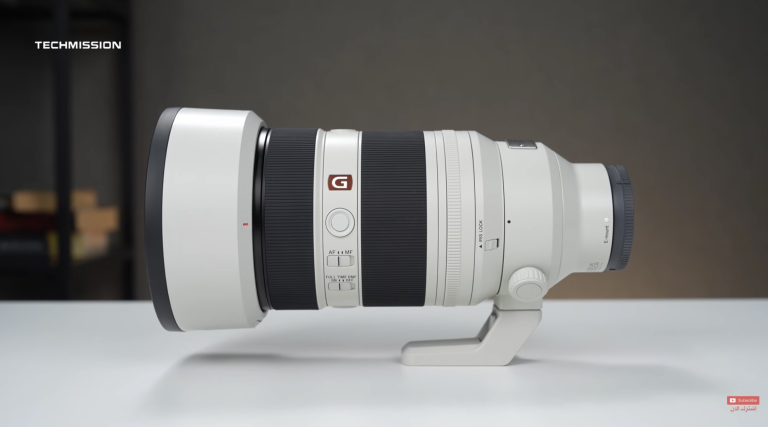
70–200mm
The Environmental Storyteller
Many people don’t immediately think of a 70–200mm lens when discussing wildlife photography.
That is a mistake.
This focal length is perfect for showing an animal within its habitat rather than filling the frame with the subject.
It excels when photographing:
- Elephants
- Giraffes
- Horses
- Camels
- Large mammals
- Wildlife landscapes
- Animals interacting with dramatic scenery
- Recommended Settings
- Shutter Speed
- Around 1/500 second
- Increase it if the subject begins moving quickly.
- Aperture
F4–F8 depending on how much of the environment you want in focus.
- Autofocus
- Animal Eye AF
- Tracking
- As required.
TechMission Tip
Environmental wildlife photographs often tell a stronger story than close-up portraits. Don’t be afraid to let the landscape become part of the composition.
100–400mm
The Ultimate Safari Lens
If someone asked me to take only one wildlife lens on safari, the answer would almost always be a 100–400mm.
It offers remarkable versatility.
At 100mm, you can photograph elephants standing beside your vehicle.
At 400mm, you have enough reach for many birds and distant mammals.
Modern 100–400mm lenses also focus surprisingly close.
Many offer excellent maximum magnification, making them extremely useful for photographing:
- Lizards
- Frogs
- Snakes
- Butterflies
- Dragonflies
- Large insects
- Other small animals encountered during a safari
While they cannot replace a dedicated macro lens for true life-size reproduction, they often allow you to capture compelling close-up wildlife images without changing lenses.
TechMission Tip
Before packing a dedicated macro lens for safari, check the maximum magnification of your 100–400mm lens. You may discover that it already covers many of the close-up opportunities you’ll encounter.
180–600mm
The Birding Specialist
Few lenses offer as much value for wildlife photography as modern 180–600mm zooms.
Their flexibility makes them outstanding for:
- Birds
- Distant mammals
- Wildlife reserves
- Raptors
- Water birds
- The trade-off is weight.
Long focal lengths magnify even the smallest camera movement.
TechMission Tip
Long telephoto lenses don’t only magnify your subject—they magnify every mistake you make. Good handholding technique becomes just as important as camera settings.
400mm F2.8
The Wildlife Portrait Specialist
A 400mm F2.8 lens is one of the finest wildlife lenses ever produced.
Its combination of sharpness, autofocus speed and beautiful background separation makes it ideal for:
- Wildlife portraits
- Large mammals
- Low-light photography
- Action
- Recommended Settings
- Shutter Speed
- 1/1000 second or faster
- Aperture
- F2.8
- Auto ISO
- Enabled
The shallow depth of field creates remarkable subject isolation while allowing lower ISO values in difficult light.
600mm F4
The Ultimate Bird Lens
If bird photography is your primary passion, few lenses rival a professional 600mm F4.
It combines exceptional reach with outstanding optical performance.
The combination of reach and wide aperture allows beautiful separation while maintaining excellent autofocus performance.
Building Memory Recall Presets
One of the most underused features of modern cameras is Memory Recall.
Whether your camera calls them Memory Recall, Memory Banks, Custom Modes or Recall Shooting Functions, they all serve the same purpose.
Instead of changing ten different settings every time the situation changes, you simply rotate the dial—or press a custom button—and your entire camera instantly transforms.
This is one of the biggest workflow improvements you can make.
Memory Preset 1
Birds in Flight
- This is the preset I use most frequently.
- Configure it for maximum responsiveness.
Memory Preset 2
Wildlife Video
Modern cameras allow completely independent video settings to be stored in memory.
Rather than constantly switching frame rates, shutter angles, autofocus behaviour and recording formats, dedicate one memory position exclusively to video.
Exactly how that preset should be configured depends on your filming style and the type of wildlife you are documenting.
Because wildlife videography introduces additional considerations—including shutter angle, codec selection, frame rates, recording formats and audio—we’ll cover it in a dedicated TechMission guide.
For now, I strongly recommend reserving one memory position exclusively for video.
Your future self will thank you.
TechMission Tip
Resist the temptation to mix still photography and video settings within the same memory preset. Keeping them completely separate avoids confusion when the action suddenly starts.
Memory Preset 3
Wildlife Portraits
This preset prioritises image quality rather than speed.
Memory Preset 4
Fast Mammals
Designed for unpredictable movement.
This preset is ideal for foxes, cheetahs, wolves and other fast-moving mammals.
Choosing the Right Lens
The following recommendations provide a practical starting point.
| Situation | Recommended Lens |
|---|---|
| Birds | 600mm |
| Large mammals | 200–400mm |
| Wildlife portraits | 300–600mm |
| Safari | 100–400mm |
| Landscape wildlife | 70–200mm |
| Environmental wildlife | 70–200mm |
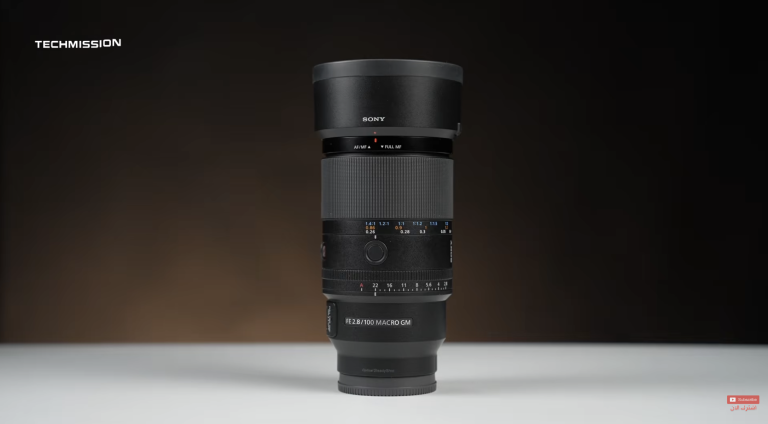
| Macro wildlife | 90–105mm |
There is, of course, no single correct answer.
Wildlife photography is often about making the best use of the equipment you have available rather than wishing for equipment you don’t.
What to Pack
Packing for wildlife photography is a balancing act.
Every additional piece of equipment increases your capabilities—but also increases weight, fatigue and complexity.
I generally divide equipment into two categories.
Essential Wildlife Kit
If you’re heading out for a typical safari or wildlife excursion, this is what I recommend carrying.
- Camera body
- Telephoto lens
- Spare battery (or two)
- High-speed memory cards
- Lens cleaning cloth
- Rocket blower
- Rain cover
- Water
- Sun protection
This lightweight setup is sufficient for the majority of wildlife situations.
Professional Expedition Kit
For dedicated wildlife trips or assignments, my packing list becomes more comprehensive.
- Two camera bodies
- Wide-angle lens
- 70–200mm lens
- Long telephoto lens
- Macro lens
- Extra batteries
- High-speed memory cards
- Portable SSD
- Laptop
- Cleaning kit
- Power bank
- Rain covers
- Bean bag
- Monopod
A tripod can also be valuable, but only in locations where there is enough time and space to set it up, such as photographic hides, observation platforms or fixed shooting positions.
For the majority of wildlife photography—particularly safaris and situations where subjects move unpredictably—I strongly prefer shooting handheld or using a monopod. Both provide far greater mobility and allow you to react quickly as the scene unfolds.
If your wildlife adventures involve independent forest hikes, mountain expeditions or desert treks, I also recommend carrying a dedicated GPS device or satellite communicator for safety.
On organised safaris, however, this is usually unnecessary, as your guide will typically have GPS-enabled navigation and emergency communication equipment in the vehicle.
TechMission Tip
The best wildlife bag isn’t the one that carries the most gear—it’s the one that allows you to access the right gear immediately when the moment happens.
Build Your Kit Around Your Photography
It is easy to become obsessed with equipment.
We’ve all looked at photographs captured with 600mm F4 lenses and imagined that buying the same lens would produce similar results.
In reality, wildlife photography is far more dependent on patience, fieldcraft, light and understanding animal behaviour than on owning every lens available.
A photographer carrying one camera and a 100–400mm lens who understands wildlife behaviour will consistently outperform someone carrying £30,000 worth of equipment without that knowledge.
The purpose of your equipment is to support your photography—not define it.
Choose the kit that matches the subjects you photograph most often, organise it so it becomes second nature to use, and spend the rest of your energy watching the wildlife rather than thinking about your camera.
Over the previous four parts, we’ve configured every aspect of the camera—from autofocus and shutter modes to lens selection and memory presets.
The final step is putting everything together into a workflow that becomes second nature in the field.
Wildlife photography isn’t about remembering dozens of settings. It’s about building habits. Once your camera is configured correctly, your attention shifts away from menus and towards the only thing that really matters: the behaviour of the animal.
This final chapter is designed as a practical field reference that you can revisit before every wildlife outing.
Wildlife Settings Cheat Sheet
The following recommendations are intended as reliable starting points. Wildlife photography is influenced by light, weather, subject behaviour and the equipment you’re using, so don’t hesitate to adapt these settings when the situation demands it.
Remember that these are starting points—not rigid rules.
| Scenario | Shutter Speed | Aperture | ISO | Autofocus | Notes |
|---|---|---|---|---|---|
| Birds in flight | 1/3200–1/4000 | Wide open | Auto ISO | Bird Detection + Tracking | Pre-Capture ON |
| Bird taking off | 1/3200 | Wide open | Auto ISO | Tracking | Pre-Capture ON |
| Bird landing | 1/2500 | Wide open | Auto ISO | Tracking | Continuous burst |
| Perched bird | 1/800 | Wide open | Lowest practical | Bird Eye AF | Short bursts |
| Wildlife portrait | 1/500–1/1000 | Wide open (F2.8/F4 where available) | Lowest practical | Animal Eye AF | Prioritise eye contact |
| Fast mammals | 1/2000 | Wide open | Auto ISO | Animal Detection + Tracking | Continuous High |
| Walking mammals | 1/1000 | Wide open | Auto ISO | Animal Detection | Short bursts |
| Resting animals | 1/320–1/640 | Wide open | Lowest practical | AF-C | Stay ready for sudden movement |
| Environmental wildlife | ~1/500 | F8 | Lowest practical | Animal Detection | Include the landscape |
| Sunset silhouette | Manual | F8–F16 | Base ISO | AF-C or Manual Focus if required | Expose for the sky |
| Reptiles and amphibians | 1/500 | F8 | Auto or Manual | Single Point AF | Use lens magnification where possible |
TechMission Tip
Save this table on your phone or print it as a small reference card. After a few trips, you’ll rarely need to look at it again.
Reading Animal Behaviour
- The best wildlife photographers don’t react to movement.
- They anticipate it.
Learning to recognise behavioural cues is often more valuable than buying a faster camera.
For example:
A bird that repeatedly looks in one direction may be preparing for take-off.
A hunting fox will often lower its body moments before pouncing.
An eagle approaching a perch almost always slows and raises its wings before landing.
A lion staring intently at another animal may be seconds away from interacting.
Recognising these subtle signals gives you enough time to activate the appropriate memory preset, raise your camera and compose your shot before the action unfolds.
No autofocus system can replace observation.
Composition Matters Just as Much as Camera Settings
It’s easy to become absorbed by shutter speeds, autofocus modes and ISO values.
- But viewers don’t see your camera settings.
- They see your composition.
Ask yourself a few simple questions before pressing the shutter.
- Is the background distracting?
- Can I lower my shooting angle?
- Would moving a metre to one side improve the composition?
Is there enough space in front of the animal to suggest movement?
- Can I simplify the frame?
- Technical perfection rarely rescues poor composition.
TechMission Tip
Whenever possible, photograph wildlife at eye level. Images taken from the animal’s perspective feel more intimate and immediately create a stronger emotional connection.
The Most Common Wildlife Photography Mistakes
- Every wildlife photographer makes mistakes.
- The goal is to make them only once.
Using AF-S Instead of AF-C
- Animals rarely remain completely stationary.
- Continuous autofocus should be your default.
Choosing Shutter Speeds That Are Too Slow
Motion blur caused by subject movement cannot be repaired later.
When in doubt, increase shutter speed.
Shooting JPEG
- Storage is inexpensive.
- Unique wildlife encounters are not.
- Always capture RAW files.
Forgetting to Use Pre-Capture
Modern cameras can record moments that happen before you fully press the shutter.
Ignoring this feature means throwing away one of the biggest technological advantages available today.
Constantly Changing Camera Settings
If you’re regularly diving into menus while photographing wildlife, your camera probably isn’t organised efficiently.
- Use memory presets.
- They exist for exactly this reason.
Carrying Too Much Equipment
One of the most common mistakes is packing every lens “just in case.”
Heavy equipment slows you down, tires you more quickly and often prevents you from reacting naturally.
Take what you’ll realistically use.
Ignoring the Background
Sharp subjects don’t automatically produce strong photographs.
Branches growing out of an animal’s head or bright distractions behind the subject immediately reduce image quality.
Background awareness is just as important as autofocus accuracy.
Forgetting to Reset Settings
Few things are more frustrating than discovering that yesterday’s silhouette settings are still active while photographing birds the following morning.
Before every outing, verify your exposure mode and memory preset.
TechMission Tip
I make it a habit to return the camera to my default wildlife preset before putting it back in the bag. The next outing always begins with a known starting point.
A Typical Wildlife Workflow
- By now, you’ve seen dozens of individual recommendations.
- Let’s bring them together into a practical sequence.
Before Leaving
- Charge all batteries.
- Format memory cards.
- Clean lenses.
- Check firmware if appropriate.
- Verify memory presets.
- Confirm RAW recording.
When You Arrive
- Observe the environment before taking the camera out.
- Mount the lens most likely to stay on the camera.
- Select the appropriate memory preset.
- Check light direction.
- Verify autofocus mode.
Before Photographing
- Watch the animal first.
- Study its behaviour.
- Predict what it is likely to do next.
- Position yourself.
- Compose carefully.
- Only then begin shooting.
After the Sequence
- Resist reviewing every image immediately.
- Wildlife often provides a second opportunity moments later.
Review your images only when the action has clearly finished.
Before Leaving the Location
- Return the camera to your default preset.
- Check remaining battery capacity.
- Verify available card space.
- Clean dust from the lens.
- Pack methodically.
- Small routines prevent big mistakes.
Final Thoughts
Technology has transformed wildlife photography.
Today’s autofocus systems recognise birds, animals and even individual eyes with remarkable accuracy. Cameras can shoot silently at astonishing frame rates, buffer images before you press the shutter and track subjects that would have been almost impossible to photograph only a decade ago.
Yet despite all these technological advances, the fundamentals remain unchanged.
The best wildlife photographs still belong to the photographers who understand light, anticipate behaviour, compose thoughtfully and spend time observing rather than simply pressing the shutter.
- The camera is no longer the limiting factor.
- Preparation is.
- Patience is.
- Fieldcraft is.
Configure your camera before the action begins. Build memory presets that allow you to react instantly. Learn the habits of the animals you photograph. Carry only the equipment you’ll actually use.
Most importantly, remember that every outing teaches you something new. Even after years of photographing wildlife, I still return from every trip with fresh ideas, new techniques and a deeper appreciation for the natural world.
If this guide helps you spend less time adjusting your camera and more time watching wildlife, then it has achieved exactly what it set out to do.
TECHMISSION Wildlife Photography Checklist
Before every wildlife outing, ask yourself these ten questions:
- ✓ Are all batteries fully charged?
- ✓ Have I formatted every memory card in-camera?
- ✓ Is the camera recording RAW files?
- ✓ Is AF-C enabled?
- ✓ Have I selected the correct memory preset?
- ✓ Is the appropriate lens already mounted?
- ✓ Is Pre-Capture enabled if I expect unpredictable action?
- ✓ Have I checked my shutter mode (mechanical or electronic) for today’s conditions?
- ✓ Is the camera clean and ready?
- ✓ Am I watching the wildlife—or am I still looking at my camera?
If you can answer “yes” to every one of these questions, you’re ready to concentrate on what really matters.
The next unforgettable wildlife moment could happen at any second—and your camera will be ready when it does.